Wednesday, June 30, 2010

Summer Semester '10: Squash Flowers are in Season

Figure 46.u - Behold, the mighty squash flower!
Squash blossoms are what I consider the ultimate seasonal food. Unlike even the venerable pomegranate (formerly only available around Thanksgiving, now seen in grocery stores year-round) you can only get squash flowers over a few weeks at the end of spring and the beginning of summer.

I'm lucky enough to have a family friend who sends me a beach-ball sized bag every year.

These edible flowers have a taste that's unlike anything else like them. They are very un-floral in taste, and not perfume-y at all. They have a very delicate, vegetal flavor with just a slight sweetness. So, what do you do with them? Traditionally, they are dredged or battered and fried. I have seen them on restaurant menus stuffed with cheese. When I get sick of frying them, I've been known to top pizzas with them, and I'm thinking about baking them into a quickbread in lieu of regular zucchini. My mom recently made a frittata (read: thick italian omlette) out of them, and it was better than a regular zucchini frittata she made the same day.

If you happen to have your own squash plants, make sure you only pick the male flowers, which grow on long stems. The female ones will eventually develop into the actual squash itself. Don't pick too many at once, or there won't be enough male flowers around to pollinate all the female flowers in the first place.


Traditional Squash Flowers

  • As many male squash flowers as you can get your hands on, long stems removed. Leave the green leafy part at the bottom, though.
  • A glass pie plate full of all purpose flower
  • Another glass pie plate with 5-6 eggs, cracked and whipped up with a fork.
  • Vegetable oil for frying.
  • Salt to taste

Wash each flower thoroughly, making sure to rinse out inside the petals, as ants and other critters may have haplessly fallen in. Dredge each flower first in flour then in egg and fry at medium heat. Flip once, when golden brown. Remove to a plate lined with paper towels to absorb any extra oil, salt to taste and eat hot. In my house, these never make it farther than the paper towels, never mind a serving plate.


Figure 46.v. - Ready to eat, hot out of the pan.
Next week we have a cool dish for a hot night.

Tuesday, June 22, 2010

Summer Semester '10: Summer Reading List

Recommended:

"Ratio" by Michael Ruhlman – This book goes beyond just bread. It breaks any and all baked goods, as well as some sauces and other dishes, into simple ingredient ratios that can then be infinitely varied upon without any further help from the book (i.e. without recipes). This book comes the closest to how I cook for myself: I use a somewhat set number of techniques and vary ingredients to accomplish the dishes and flavors I want.


"Zingerman's Guide to Good Eating" by Ari Weinzweig – This book is broken down by ingredient, and tells you how to buy and use the highest quality items in each category (i.e. cheeses, spices, meats, grains).


"Omnivore's Dilemma" by Michael Pollen – This book will present a very different view of mass-market food, especially processed and prepared foods than what the marketing that surrounds us does. The best part is, that Mr. Pollen does it in a non-preachy, non-judgmental way. He understands why some people need to buy cheap, high calorie, low quality food, but he also understands the consequences.


"My Bread" by Jim Lahey - Previously covered in the course "Other People's Food 101." Will give you the tools you need to make amazing bread with relatively little work, and includes many variations on the basic loaf of bread. Also includes other savory baked goods.
(Optional):


"Heat" by Bill Buford – A cautionary tale of what happens to a journalist/amateur home cook when he decides to join the world of professional chefs and kitchen staff.

Thursday, June 17, 2010

Tony's Food 101: Pork for a Party

I know I was initially going to post a recipe inspired by me watching both seasons of HBO's Rome, but I got a request for something I served up at a small dinner party at my place a while back. It's a tasty way to cook up a pork loin. I like to buy one of those HUGE ones at the grocery store (or your local whole-sale warehouse store), then cut it down the middle and freeze half. Feel free to pick up one of the smaller ones, but know that you'll pay $2-4 more per pound. This particular recipe is cooked like an Italian porchetta, but with a filling similar to my mom's braciola.

Stuffed Pork Loin
  • Half of a large pork loin, roughly 5-6 lbs. There's a few butcher-type tricks you'll have to pull with this piece of meat, described below.
  • Two big bunches of parsley from the grocery store, stems mostly removed.
  • An entire bulb of garlic, all papery peel removed.
  • About a quarter pound of Parmaggiano-Reggiano cheese coarsely diced.
  • Black pepper, coarse salt and olive oil in sufficient amounts to lightly coat the outside of the pork loin.
  • (Optional) Adding fennel seeds to the garlic/parsley/cheese filling will make this more like a true porchetta.
  • (Optional) Feel free to add an herb blend (herbs de provence, italian seasoning, et cetera) to the pepper/salt/oil coating.
  • It's not edible, but you will need about 2 feet of clean twine.

Preheat your oven to 475 degrees. Take your pork loin, and score the fat along the side of it into a diamond pattern. There's an easy way to stuff this baby, and a hard way. For the easy way, cut it lengthwise like a baguette and put the fillings in the middle. For the hard way, make a shallow cut in the same area, open it up, and then keep making a shallow cut in the same area until you have a large, flat piece of pork (that you will later roll back up into a pin wheel). Once you have your pork loin open, sprinkle the fillings in an even layer over the flat surface. Roll it up and secure it in three places with twine. Cover the outside of the loin with the pepper, oil and salt. Place on that roasting pan that came with your oven - the one with the slotted metal part that fits over the deeper roasting pan. As soon as you put it in the oven, decrease the heat to 350 degrees. Cook for 2 1/2 hours, then make sure to have the pork rest for 10-20 minutes after you take it out of the oven. Slice into thick or thin slabs (remove the twine first) and serve.

I will try to update more frequently, I'll be making up a bunch of new recipes with the random greenery the CSA my girlfriend and I joined sends me.

Friday, May 7, 2010

Tony's Food 101: Asparagus is in Season

That's right, everyone's favorite tender, spear shaped veggie is back on the markets again.
It seems like a paradox to me how vegetables can be unhealthy, but the recent bacon craze is aparently trying to bring asparagus down too. Restaurants across the U.S. will be wrapping asparagus spears in all sorts of cured pork products, making them more like cholesterol rockets aimed right at your arteries. I'm not saying that it's not a brilliant combination, as far as taste goes, I'm just proposing a healthier, markedly lighter alternative for this veggie. Bacon wrapped asparagus just reminds me too much of Paula Deen ruining ears of corn (As a physician, I'm always puzzled as to how her heart is still beating. This is the woman who made a hamburger and used krispy kreme donuts as buns).

Likewise, a slightly more healthy way to cook this spring favorite is grilling, which is also delicious, but cannot get around the universal 120-calories-per-tablespoon-of-oil necessary to keep them from turning into carbon tubes over those charcoals. It's waaaaay better for you then wrapping them in prosciutto, but those of us still trying to shed some winter weight may want an alternative.
Enter steamed asparagus. I know, I know: Just like a doctor to tell you to steam vegetables and take away everyone's fun. These are different, and they use a little trick I figured out to add extra flavor without altering the nutritional value of the asparagus: Lemon Steaming. And, I am a cook too... this recipe needs a little salt added.

Lemon Steamed Asparagus

  • One bunch of asparagus. Take your pick whether you get the pencil thin or big fat ones, just know it will affect your cooking time. Wider asparagus = longer cooking. Wash them, then snap them about two thirds from the head. This gets rid of the woody, impossible to actually eat stems. If you just bend the asparagus in this region, it will naturally snap where the stem gets too tough.

  • One lemon, sliced into disks.

  • Black pepper and salt to taste.

Pre-heat your oven to Bake 350. Line the bottom of a glass 8x8 or 9x9 square dish with lemon slices. Arrange the asparagus in as close to a single layer over the lemons as possible. Season with salt and pepper. Cover the whole thing tightly with tin foil, and put in the oven. Leave in for about 20-25 minutes if you like your aspargus crisp, or 30-35 minutes if you like it "well done." You should be able to smell the asparagus and lemons around your oven. Discard the lemons and eat.


So. You're done with dinner. A commercial comes on during your favorite show. You trot over to the bathroom, unzip and let g.... wait a minute? What the heck is that smell?


Congratulations. You've discovered the downside to eating asparagus, and you're also sort of genetically special. Sort of. There are two different genes floating around in your cells: one to excrete an unidentified compound from asparagus into your urine, and another to be able to detect the smell. So you're in a group of 20-40% of people with this combination. It won't get you into the X-Men or Heroes, but hey, it's something.


Be back next week with some Reconstructionist cuisine... yes I am that nerdy. Sorry about the lack of real pictures, my digital camera bit the proverbial dust. I'll try to con my girlfriend into letting me borrow her's.

Tuesday, April 20, 2010

Other People's Food 101: The Bread that Changed Everything

Remember how in my first few posts, I pretty much said I hate baking.


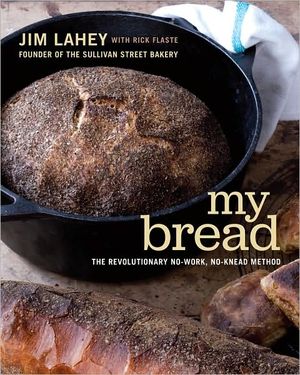
I still do. I just hate it a lot less, and it's fully because of this book:


Figure 17.B-2 If I had a summer reading list for you guys, this would be on it... that gives me an idea for a post!

I've been churning out loaf upon loaf of crusty, flavorful bread with a soft, tender crumb that would impress even the octogenarian Italian bakers back home. I'm happy to provide you guys with the formula and technique for this little food revolution, courtesy of the man who wrote the book:

Sullivan St. Bakery Bread Recipe - This is a little bit modified than the original technique in My Bread, but it's the same principle. Plus, I'm not breaking any copyright laws by posting this link.

A couple caveats: 1) although it may look cumbersome and drawn out (particuarly the 18 hour rising time), this recipe is stunningly easy. You mostly ignore the bowl of dough on the counter and go about your normal life while it does it's own thing, then chuck it in the oven for less than an hour. 2) I use a plain, seasoned cast iron pot like is shown on the cover of My Bread, primarily because I can't afford the Le Crueset he recommends. Plain cast iron, well cared for, works fine.

Wednesday, April 14, 2010

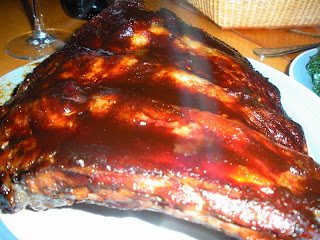
Tony's Food 201: Epic Ribs

I love everything about ribs.

I love the tenderness of the slow cooked, marbled meat. I love the smoky-grilly flavor. I love the satisfaction felt by tearing meat from the bone with the incisors and canines we evolved for that express purpose.

So of course, I had to tackle making them myself. This particular series of experiments started in medical school, and I've repeated it four or five times since, under varying conditions and sometimes with varying out comes. I made them once at my girlfriend's father's 60th birthday cook out, on his smoker. Little did I know, the birthday boy over did it on the charcoal and the grill heated to 600 degrees, during the "slow cooking" phase of the recipe. Apparently it was better than the last time he used the smoker, as one party-goer told me, when he got it up to temperature that actually made the paint on outside of it boil.

The biggest set back in creating this recipe was moving to place where state law doesn't allow gas or electric grills on balconies. I've since successfully modified the overall technique to take advantage of ovens. They come out almost as good as on the grill. I'm proud to say I figured out this whole recipe on my own, with out looking at any references for ideas. Also posted is my recipe for barbecue sauce, which co-developed with the rib recipe. Feel free to use regular old barbecue sauce from a bottle, though. Trader Joe's makes a good Kansas City style sauce.
Tony's Epic Ribs, On the Grill
  • Enough hickory or mesquite wood chunks to cover the bottom of either a charcoal or gas grill. Soak them in water for an hour or two before putting them on the grill. The chips will burn up too quickly, the chunks will last long enough to smoke your ribs.
  • 3-4 bone-in beef ribs per person you want to feed. I have yet to use pork ribs, but I guess you could substitute those if you can't find beef. This recipe probably won't work with boneless ribs, by the way, although feel free to try.
  • 1/2 cup of barbecue sauce per serving of ribs, plus extra to serve the ribs with after they're done cooking. My personal, homemade sauce recipe to follow.

For gas grills, arrange the soaked wood chunks along the bottom of the grill, and turn all burners on to low heat. Since this technique requires a drastic temperature change to finish the ribs, it's a little bit trickier for charcoal grills. You want to set it up so that your coals are only on one side of the grill. This will give you a "hot zone" and a "cool zone," arrange your wood chunks over the embers one one side. Place the ribs on the one the grill (over the "cool zone" on charcoal grills) and allow them to slowly smoke for over 2 hours. The longer you let this process go, the more tender your ribs will be. After they're cooked through and tender, either turn up the heat on the gas grill or transfer them to the "hot zone" of your charcoal grill. Slather them with barbecue sauce and let it bake/glaze on, about 20-30 minutes. Serve them with extra sauce and let your inner carnivore loose.

Oven Variant

This variation involves the same principle as above: slow cooking the meat to tenderness, then adding sauce and turning the heat way up. You won't have the advantage of adding extra flavor from hickory or mesquite wood though, so make sure you choose a sauce with enough smoke to make up for it. Use the same ingredients as above (minus the wood, of course). Place the ribs into a 250 degree oven for two hours. At this point, you can even take the pan out, cover it, and finish them later in the day if you're crunching on time, or traveling for a cookout. Once they're tender and cooked through, add your sauce and turn up the heat to 475. Let the sauce glaze on for 20-30 minutes. Again, you could potentially slow cook these bad boys in the oven first, then bring them to some one's house for a cookout and impress your friends after finishing them off on the grill.

The Barbecue Sauce Formula

I don't know that my barbecue sauce mimics a certain "style." There are tomato elements in there, so I guess if anything it would be a Western or Southwestern style of sauce.

  • 1/2 can of chipotles in adobo (use about 1/2 of the chilies in the can and 1/2 of the adobo sauce).
  • One large raw yellow or white onion, chopped.
  • 1/3 cup of molasses, preferably blackstrap.
  • 3 tbs. olive oil
  • 3 tbs. tomato ketchup
  • 2 tbs. Worcestershire sauce
  • 1 tsp. smoked paprika
  • black pepper and salt to taste.

Blend these all together. I use my immersion blender, less cleanup. Feel free to adjust any of the individual ingredients for individual taste, or to balance the tastes in the sauce. You ultimately want a sauce that is sweetand smoky, and just a little bit tangy. The olive oil will give it a good, rich mouthfeel, but won't majorly contribute to the flavor.

Tuesday, April 6, 2010

Tony's Drink 101: The Legend of the Beer Margarita

It all started in fourth year medical school. Some of you may be (or have been) fourth year medical students, so you know that much like during your senior years of high school and/or college, you're sitting pretty. Well, I happened to be sitting pretty in my apartment, flipping through the channels, when I started watching Knocked Up. Not realizing that this is the second worst movie ever (the worst being one I was forced to sit through by my high school friends), I quickly turned it off and went down by the apartment complex pool. A friend and fellow medical student was there, so we shot the shit for the rest of the afternoon. Later, he and his girlfriend (yet another medical student) invited me over for pulled pork and margaritas.

This is where the revelation of the Beer Margarita began.

That's right. A margarita that contains beer. It may sound disgusting, but trust me on this one: As long as you use the right beer (certainly no porters or stouts), these are crisp, refreshing and lack the sticky-sweetness that you get with most commercial mixes. I have been making them regularly for a variety of events, not limited to nights when my girlfriend and I make burritos, or my residency program's "Annual International Guacamole Competition," and they are always wildly popular.

Beer Margaritas

  • One can of frozen Limeade concentrate
  • Tequila
  • Triple Sec (or Grand Marnier)
  • One 12 oz. bottle of beer. I usually use Corona, Coronal Light or Bud Light with Lime. Any lightly colored beer is great in this mix, but feel free to experiment. A few microbreweries make raspberry or blueberry lagers that I can imagine would taste pretty good.

Dump the frozen concentrate into a pitcher. Fill the empty can all the way with tequila, and add it into the pitcher. Fill the empty can half way with triple sec and pour it on in. Finally, pour in your beer and give it a gentle stir to make sure the concentrate is dissolved - don't stir too much or you'll flatten the carbonation added by the beer. Pour over ice and enjoy!