Thursday, December 24, 2009

Winter Break

Hi Readers,

Things are getting hectic with the holidays and my on-call schedule has revved up for these last two weeks of December. See you back here in 2010.

Merry Christmas, Happy Holidays, Happy New Year!

Tony

Wednesday, December 16, 2009

Tony's Mom's Food 101: Roasted Red Peppers

So according to my tag line, I'm an Italian Boy. This is both by heritage (100%, by the way) and by the old adage "You are what you eat." I grew up eating Italian, because that's what my mom knew how to make, because that's what her mom knew how to make, ad infinitum. I was also fortunate enough to have a grandfather who, in his retirement, kept a huge vegetable garden. Every spring, summer and fall were filled with fresh produce grown only one town over from my home. Locavores, eat your hearts out. Therefore, I am a product of my parents and so is my minor obsession with food, as well as my innate ability to cook American-Italian food (Figure 12.p).
Fresh produce only lasts so long, though. What did we do with bushels of peppers, cucumbers, tomatoes and squash? A good deal of it was given away, especially towards the end of each season. The tomatoes were stewed and canned in the traditional style, and then made in to red gravy (what people of non-Italian descent would refer to as red sauce, spaghetti sauce, tomato sauce, marinara, or pizza sauce). My mom's red gravy is a jealously guarded secret, which of course will never be published on this website. What I will write about is what we used to do with the red peppers: roast them (and subsequently freeze them - more on that later). She has actually shared this recipe publicly a couple of times, once given to me to give to a college friend who was compiling a dorm hall based cook book, and once to my parents' local paper, a picture of my mom holding the finished product included. Needless to say, I won't be "off-ed" or "whacked" or any other stereotypical Italo-American slang term for "assassinated" for sharing this recipe - I'm just sharing it with more people than before.
Figure 12.p - My parents. Me taking a picture of them taking pictures of each other = meta-irony. Not really.

I know what you're thinking, you can just buy roasted red peppers in a jar in the grocery store. I tried that once, and I almost threw the jar out because they tasted like crap compared to the peppers I'm used to. Comparing these home made roasted reds to the grocery store jars is like saying you're going to serve Spam with cloves in it on Christmas. It would work if the people you were serving it to had only ever eaten Spam and had no clue what a real roasted and glazed ham tastes like. Spam and roasted red peppers from the jar are a proverbial slap in the face to people who know what the real thing is like. So, without further hesitation, here is my mom's recipe for home made roasted red peppers.
Roasted Red Peppers
  • 8 red bell peppers - preferably grown by your own grandfather like mine are, but that's not mandatory.
  • 1/3 cup of water.
  • olive oil - you're using it raw here, so haul out the good stuff. Extra-virgin only. Cold-pressed highly suggested, unfiltered preferred.
  • one clove of garlic, minced.

Wash your peppers, cut them in half length-wise, remove the green core and every single seed. Place them in a roasting pan or a deeper-sided cookie sheet face down in a single layer, coat the bottom of the pan with the water. Move your oven rack to the second-from-the-top position and set the oven to broil. Broil for about 20 minutes, until the skins are totally black. Remove the peppers from the pan and place them in a large mixing bowl. Cover the bowl with plastic wrap and a clean dish towel. This will make them steam (since they're still hot) and will cause the burnt, black skin to peel away from the lightly caramelized flesh. Let them do this for one hour. Peel the skins off and throw them away. Cut your newly skinned peppers lengthwise into long strips.

At this point, you have one of two options. Either dress them with olive oil and garlic, place them in the fridge and allow the flavors to marinate for a while, or freeze them and bring containers to your adult son who is too lazy to do this whole process himself as often as you do. They freeze and thaw just fine (Figure 12.q) . Either you or your adult son can use them however you would presumably have used the awful ones from the jar - in antipastos, on pizzas, or tossed with pasta. The best way to eat them is on a sandwich made with crusty Italian bread and a slice of Provolone cheese.

Figure 12.q - Un-dressed roasted peppers in their natural habitat. This specimen is post-thaw.

Until next week!

Tuesday, December 1, 2009

Meat 101: Braised Short Rib

Thanksgiving break is over, back to the learnin'.

A couple of months ago, my girlfriend and I went on a short vacation to Burlington, VT. I had spent a month there on an audition rotation for a neurology program, and then we had gone in 2008 for a short weekend away. Needless to say, I'm pretty familiar with Burlington, but prior to this last vacation I had never been to Trattoria Delia, and had never eaten wild boar (Figure 8.a).

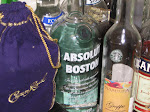
Figure 8.a - The noble and apparently delicious wild boar. (http://www.linburnes.org/)

They served it braised, pulled apart and tossed with heavy, hearty roman gnocchi. It was an amazing meal to be had on a freezing Vermont evening. The problem with knowing how to cook is that every time you sit down to a meal, you think "I could do that." Not willing to buy wild boar meat online and have it shipped across the nation (my mom always told me never to pay more than $1.99/lb for meat, a truth I've held to for the majority of my adult life) but wanting to re-create the dish I loved so much from my vacation, I set off to the grocery store. I was armed with a knowledge of cuts of beef, their relative flavors, and the application to use them in (Figure 8.b).

Figure 8.b - I like this chart because it reminds me of the periodic table. (http://fornaturalfood.com/)

Braising is a form of slowwwww cooking, so its ideal piece of meat is one that is as flavorful as possible, tenderness be damned. It's the same reason stores sell super-tough chuck all cut up for stew - by the time you're done simmering it, it will be as tender as... well... use your imagination. That day, I ended up with a package of boneless short rib that they were selling on the cheap. I already had the other essentials for braising at home (Figure 8.c) - a dutch oven, plenty of wine, black pepper and salt. So I set to it, and here we are to reap the fruits of my experimental labor.


Figure 8.c - Braising essentials, in no particular order.

Braised Short Rib

  • One or two pounds of boneless beef short rib, or three to four pounds of beef short rib on the bone, depending on how many people you plan on feeding and how long each of you plans on eating left overs. The key here is to at least double up on the pounds if you're buying your meat on the bone. Any meat with bones is arguably more flavorful than without, but do what you want.
  • One or two big glugs of olive oil.
  • A large onion, cut into half-rings.
  • Enough black pepper to slightly surpass your comfort level.
  • Half a hand full of sea salt or kosher salt.
  • A bottle of red wine that you like - I pictured Pinot Noir because that's the only one I had on hand tonight. For the initial recipe, I used an old vine zinfandel. Feel free to use Cabs, Chiantis, Super-tuscans, et cetera.
  • (Optional) A couple of sprigs of fresh rosemary.
  • Two big pats of butter -or- two more big glugs of olive oil.
  • Half and hand full of all purpose flour.

Preheat your oven to Bake 275. That's right. Not the universal bakers' 350, 75 degrees less than that. Coat the meat with salt and pepper. Place the oil, the onions and your short rib in a dutch oven. I use plain cast iron, the enamel ones work fine too. You can use any pan with a cover that you can put on the stove top and the oven without it melting. Brown the meat on all sides well on medium high heat.

Pour yourself a glass of wine. After the meat is done turning brown and tasty, pour the rest of the bottle of wine into the pot. Add the rosemary, if you're using it. Scrape what ever's stuck to the bottom up with a wooden spoon. Cover the pot/pan/earthen vessel/whatever and place in the oven. Let it simmer (i.e. braise) for two or three hours. Honestly, the longer you let it sit, the more tender the meat will be.

Finally, take the pot out of the oven. Scoop the meat out (leave the onions in), put it on a plate and cover it with tin foil. Return the pot to the stove top, and turn the heat up to high. Let the braising liquid (wine + meat juices = braising liquid) bubble away until it's about half way reduced. In a seperate pan, let your flour heat in a dry pan until it starts to turn gold-brown. Add in your butter or olive oil and whisk aggressively (butter + flour + heat = a roux). Take a scoop of your reduced braising liquid and whisk it into your roux, then return the whole thing back to the original pot. Reduce your heat to medium and stir, it will become drastically thicker. Return your meat to your newly formed gravy and toss it around. You can either serve it just like that, or pull it apart and toss it with pasta Vermont-wild-boar-style.

Hope you enjoyed today's installment, be back next week with more winter season food.

Wednesday, November 18, 2009

Tony's Food 101: Italian Wine Biscuits

So as a general rule, I don't bake. I have to hear about enough science at work, I prefer my food to be more of an art. Maybe "craft" is more of an appropriate word, actually. But as with medicine and with everything, there are exceptions to every rule. Every once in a while, the spirit moves me, I get out my measuring cups and make an Italian biscuit. There are three types of biscuits you'll find in the Italo-American bakeries of my native Southern New England: Pepper, Egg and Wine. These are the foods I was raised on, along side red gravy (what most of the rest of the U.S. calls "pasta sauce") and crusty Italian bread. Among my mother and her two sisters, each of them excels at one biscuit. My mom makes pepper biscuits, her sister Donna holds claim over wine biscuits, and every Easter my aunty Elaine churns out enough egg biscuits for the whole family. I guess this is generational; my brother makes pepper biscuits that would make any Nonna cry tears of shame that her's aren't as good. Egg biscuits are way to sweet for my tastes, so I decided to take on the partially sweet, partially savory wine biscuit*. This is a recipe that I ripped off from an OLD very Italian Catholic parish's fund raiser recipe book that my mom had lying around.

* I tried making a batch for a road trip I'm going on this weekend, and apparently I'm a little rusty. The pictures I took of the process are fine, the end result looks nothing like the biscuits I've been making since college. Rather than rising, they totally flattened out into cookie-esque shapes. Another reason I prefer to avoid baking: if you don't do everything exactly right, it doesn't work.


Italian Wine Biscuits


  • 4 cups of flour

  • 2 cups of granulated sugar

  • 4 teaspoons baking powder

  • 1 cup of really bold red wine. I like Chiantis. Pour your self a glass to drink, this will make the process more bearable if you're a bake-hater like me.

  • 3/4 cups vegetable/corn/canola oil.

  • (Optional) One egg yolk, seperated from the whites. Save the whites and make an omlette for yourself tomorrow for breakfast. Tomorrow you will be grateful.

Prehead the oven to Bake 375. Mix together all of your dry ingredients, then stir in your wet ingredients. You will end up with an un-appealing purple mass. Incidently, this is the exact color of the first batch of risotto I ever made, and hence why my roommates wouldn't touch it (Figure 6.a).

Figure 6.a - An aerial view of something you probably don't want to eat just yet.

Pick up clumps of the dough and roll them into pencil sized pieces, like a kindergartener making snakes out of Play Doh snakes. (Figure 6.b).

Figure 6.b - Pencil sized Play Doh snakes - okay, it's a fat pencil.

Fold these in half and twist them into ring-shaped knot forms. If you're interested in having your biscuits shine like justice, brush the tops with egg yolk or milk. I used egg yolk this time around. Place onto a greased cookie sheet, or even better parchment paper on a cookie sheet and bake for about a half an hour. Give them some room, as they will rise... and expand sideways. Try to roll thinner pieces than I did, so that your biscuits look more like knots and less like turds (Figure 6.c). After they're done baking, allow them to cool so that they harden and turn really crunchy. When they're done, the purple color will have gone away, and they'll be light brown (Figure 6.d).

Figure 6.c - More like knots (bottom right) and less like turds (top right).

Figure 6.D - The finished product... which looks nothing like I had hoped for.

Store these in an airtight container to maintain crunchiness. This recipe will make about 30 biscuits, depending on how tired you get of making snakes and therefore how much longer and fatter than a pencil your snakes turn out to be.

Sorry about the missed post last week, and the lateness of this week's post. Life's been kind of hectic lately, but stay on board. Things will pick back up as scheduled next week!

Tuesday, November 3, 2009

Side Dishes 101: Fiery Cauliflower

Cauliflower. The word doesn't exactly inspire the same passions as the mention of other foods: Steak and chocolate it is not. Regardless, cauliflower is a beloved vegetable of mine, but the truth is it's pretty bland. I've seen cauliflower used in a variety of ways - deep fried, slow cooked, even crumbled as a vegan replacement for parmesan cheese. It's versitility comes from it's flavor, which reflects it's pale, non-descript color. Cauliflower is a blank canvas, like boneless-skinless chicken breasts. You can layer whatever flavor you want onto it, the native flavor of broccoli's albino cousin won't compete. Not only can you add bold flavors to cauliflower, you can serve it alongside big, hearty flavors again with little in the way of competition between them.

Here's something that I made up for my brother the other week when he came over to my appartment. My brother and I had this fiery cauliflower along side some slow braised short rib - a perfect dinner for the cold days in between winter and fall.

Figure 1A. Golden, but not quite with brown at the edges yet.
Fiery Cauliflower
  • One head of cauliflower, cut into 1-2" florets. Make sure you wash this stuff well, dirt tends to make it's way in between the stems and under the crowns.

  • Four or five good glugs of olive oil. Don't use anything special here, again Colavita makes a solid, affordable olive oil.

  • Two to four teaspoons of sambal. Most grocery stores these days carry this stuff. If you can't find it, feel free to try using sriracha, korean soonchang or any other asian chili based condiment you can get your hands on.

  • One pinch of salt.

  • Grated Parmagiano-reggiano.

Preheat your oven to Bake 350. In a large mixing bowl stir or whisk the olive oil, sambal and salt together. Toss the cauliflower in this mixture until it's well coated. Spread the florets out in one layer on a cookie sheet and roast for about 30 minutes, until golden with a little brown at the edges (Figure 1A). Scoop into a serving bowl and finish off with the grated Parmagiano. Depending on how much sambal you decided to use, this may not be for the faint of heart.


Until next week!

Tuesday, October 27, 2009

Pasta 101: Linguine and Clams

One of my mom's all time favorite dishes is Linguine and White Clams, and I have to say that I whole-heartedly agree. Linguine and Clams (or as Rosetta Stone tells me: "Linguine alle Vongole") is one of those quintessential Italian dishes that you find everywhere. The problem is that many home and some restaurant versions are fraught with errors that really subtract from what could be a great food experience. What are these problems you ask? Many home versions lack the flavor of restaurant dishes, as they have the Too-Much-Pasta-to-Sauce syndrome. Okay, you order this dish at a restaurant, only to find it so drenched in oil that you they should probably be serving it with Lipitor crushed up on top rather than grated parmesan.

So where to start with making this dish successfully at home? The clams, of course. I always say that, like how Inuits have something like 40 different words for different types of snow, people from my home state of Rhode Island have at least 5 different words for clams. You have quahogs (no, it's not just where The Griffins live), steamers, little necks, cherry stones, and a whole variety of other types of clams. Most of these are not appropriate for use in Linguine and Clams, so be careful. You want the "littleneck" variety - clams that tend to fall on the small side of Clamdom. At this size, they are sweet and not too chewy (unlike their quahog cousins... er... older brothers). About one pound will be enough for two people, however I like to "augment" the amout of clams. We'll get to that in the body of the recipe.

Next you want to assess your pasta situation. How many people are you serving? I generally make all my dishes for two - and if I'm eating alone I have some for lunch or dinner the next day. That leaves us with less than half a pound of pasta. I would say somewhere between one quarter and one third of a one pound box is fine for two people. Balance is key, too much pasta and you may as well not even bother making clams to put on top of it in the first place, too little and nobody is full after they eat... and you probably won't have a back-up pasta if that happens.

So the dish is called Linguine and Clams, so what else is there? Well, olive oil for starters. I usually buy a really fragrant one from Trader Joe's called Martinis' Kalamata Extra Version Olive Oil, but if there's no Trader's in your area Colavita generally makes a good product and is widely distributed. Try to buy something that smells like olives and cut grass. If it doesn't, save it for what I like to call "industrial" uses: oiling my cast iron and wooden cutting board. Store your oil out of the sunlight, as this will make it go rancid faster. I used to make the mistake of trying to be pretentious and storing high-quality olive oil on a counter where everyone could see it. It worked, however when it came to everyone tasting it, the oil was sub-par. Plenty of garlic is a cornerstone of this dish. I find lately that garlic from the farmers market tastes more...I don't know... "garlicky" than the ones from the store. It's up to you. I still use store garlic when the farmer's market's not around. You'll also need fresh parsley, preferably Italian Flatleaf. I've been growing this parsely nearly every year since childhood, it's extraordinarly easy to grow and you'll always have just the amount you need available for use. The plastic packages at the grocery store are usually too much for one recipe, then by the time you get around to needing more... you know. Some people like chili flakes in this dish, feel free to add them in along with garlic. Now, the moment you've all been waiting for:

Linguine with White Clam Sauce (Linguine alle Vongole)
  • 1/2 pound pasta. Please do not use whole wheat brown pasta in this recipe. There's an inherent wrong-ness to it when used in classic Italian dishes, and you're really not saving that many carbs by picking it over regular varieties.
  • About 3-4 tablespoons of olive oil.
  • 2 medium or large cloves of garlic, minced.
  • One small onion, or half of a medium sized onion, diced. Any type of onion you have on hand is fine.
  • (optional) One or two teaspoons of chili flakes.
  • Liberal amounts of fresh ground black pepper.
  • One pound of littleneck clams with shells, scrubbed clean.
  • One can of chopped clams (we've always used Snows), drained.
  • A handful of chopped fresh Italian Flatleaf parsley.

Start boiling the water right away. Waiting for water to boil is always the big hold up. You can use liberal amounts of salt in the water if you'd like. Nearly every television/celebrity chef puports the notion that all Italians use insane amounts of table salt in their pasta water. While this does have a mild impact on flavor, it also promotes hypertension. In this recipe, the clams are salty enough. I usually skip salting the pasta water. While you're waiting for the water, get the garlic and onion nice and golden over medium-high heat in the olive oil. Add black pepper and chili flakes at this point too - their flavors will infuse into the oil and that's a good thing. Start the linguine boiling, you're going to want it on the hard side of al dente, as they're going to keep cooking later on.When their just golden, add in the raw clams (shell and all) and the canned clams, give it a stir, lower the heat to a little on the low side of medium and cover the pan.

After about 10 minutes, check the clams. The majority of them should be open. If any are still shut well past their peers, throw them away. There is such a thing as a bad clam. This is where the right way to make this dish differs wildly from the standard American way. Do not drain the pasta in a colander. I repeat: do not drain the pasta in a colander. Get a pair of tongs and take the pasta out of the boiling water and put it directly into the pan with the simmering clam sauce. Give it all a swirl and let it simmer for about another 5 minutes or so - long enough for the pasta to finish cooking to a perfect al dente state. Toss the parsley onto the finished dish and you're done. I serve it hot right out of the pan because I'm lazy. You can add the parsely after you've transferred it to a serving bowl if you're trying to impress someone. There. Not as hard as they make it look over at that Italian place, huh?

Tuesday, October 20, 2009

Cookware Special Seminar: Heirloom Cast Iron

Somehow, we have rural medicine to blame on this one.

Back during my rural medicine rotation in November 0f '07, I cooked for the other five medical students at this remote clinic site in Whoknowswheresville, Pennsylvania. I used cast iron for the first time, and it was badass. In the intervening two years, I would always swing by the pot and pan isle of what ever chain department store I happened to be in. It usually ended up only being a short visit due to a 1) lack of cast iron in stock on the part of the store and 2) a lack of capital on the part of my bank account. I eventually broke down and bought a preseasoned cast iron dutch oven. I will admit, it's care was a little bit more than I expected, but I use it constantly for roasts, soups, polenta, really any application that fits the size of the pot both on the stovetop and in the oven.

Flash forward to these past two weeks. First, I went to visit my parents. They are Italian, so I always leave their house with more stuff than I showed up with. During the visit in question, I left with one 4 quart cast iron chicken fryer and two long, shallow edge baker/broilers. They weren't in the best condition. My girlfriend catches wind of this, and offers me her late grandmother's cast iron 4 quart fryer and two skillets. Feast or famine, folks. I went to having no cast iron pans to having SEVEN in the course of 2 weeks. Most of them severely needed attention (Fig. C.1)


Figure C.1 - Cast Iron after lots of soap, and 20 some-odd years in a basement.


Before I would be making some badass corn bread or paella or something, I had some work to do. I did a lot of research, and some trial and error. Here is what I came up with:


Tony's Foolproof Method for Restoring Heirloom Cast Iron Cookware


This whole process takes up about half a day, so have other stuff around the house planned, as your oven will be on mostly the whole time and therefore poses a fire hazard.


  1. Examine your new old cast iron. If there is too much black stuff caked on, or if there are spots of rust, proceed to Step 2. If you're just skeeved out by using someone else's pans, proceed to the next step. If your new old pan has a non-crusty black layer on it, and you don't care what other people have been eating, proceed to Step 7.


  2. Place your pots and pans upside down in your oven and set it to automatic clean mode. This will get pretty much everything but the rust off of your pans. It will also take like 3 hours, so get a book or a video game or something. Depending how much crap is on your pan, there will be a lot of smoke. Open some windows and fire up some fans.


  3. Using a stainless steel scouring pad, scrub the crap out of the pan. Once the rust is off, you should see bare gray iron staring back at you. This is good. Dry them off with a rag you don't care about ruining, but is clean enough for you to use on a pan you'll eventually be eating with.


  4. Put the naked pans right-side-up into the oven at 325 Farenheit for 10 minutes and make sure they're dry. Any water left on the pans will cause more rust, and you'll be back to step 3.


  5. Once dry, rub a medium layer of solid cooking fat onto the hot pan. I use Crisco, because I'm poor. I have read of other people using rendered (read: left over after cooking) bacon fat, lard or any number of other solid-at-room-temperature fats. Put your greasy pan back into the oven, up side down again and let this first layer of "seasoning" bake on for one hour. "Seasoning" in this sense does not mean tasty things like black pepper or sage or Zesty Italian. It is just a layer of fat that keeps your pan from rusting and food from sticking to your pan while cooking with it.


  6. After one hour in the oven, take the pan out and repeat steps four and five once or twice more to get a good base of seasoning on the pans. After 2-3 coats of seasoning, it's okay to transition to vegetable oils for any baked-on seasonings you use. Avoid olive oil, as it has a relatively low smoke point, unless you enjoyed airing out your house in Step 1. After at least two coats, your pan should have a fine black finish to it (Figure C.2).


  7. After each use, scrub the pan with a stiff-bristled brush. I use a bamboo brush I bought in some kitchen store in Vermont that I can't find the website too. Plastic bristles are fine too. The important thing is to NEVER USE SOAP, unless you want your pans to look like Figure C.1. After scrubbing, dry thoroughly with a dish towel (mapine!). Rub the inside of the pan with a thin coat of vegetable oil while it's still hot from the water. It's safe to use olive oil here, as the smoke point doesn't matter. You're not going to heat the pan again until next time you cook with it. If there is a lid, put a piece of paper towel between the lid and the pan when you store it, and keep the lid a little off kilter from the pan. The seasoning needs air to be able to drift by.


Figure C.2 - Cast iron after Tony's Fool Proof Method for Restoring Cast Iron Cookware
Class dismissed.


Tuesday, October 13, 2009

Tony's Food 101: Mushroom Risotto

Risotto and I have a long history. Despite growing up in an Italian household, I never had risotto growing up (or polenta, for that matter, but that's a whole different story). Fast forward to my college years - my roommate and I in our first apartment away from our parents, cooking dinner every night and forcing our other two roommates to clean up after us, in the name of nutrition and cuisine. My mom, ironically, had sent me a recipe for risotto out of our local Little Italy's newspaper. My roommate and I decided to take it for a spin, however, it turns out that this particular ride was sort of a lemon. There was a single typo in the ingredients list: one cup of red wine. This aberrant cup of wine wasn't included anywhere in the instructions portion of the recipe. Was it put there accidently? Were we supposed to drink the wine while cooking the rice? Was it supposed to say "white wine"? Although not one of the great mysteries of the modern world, we were still confused by this inclusion. We put the red wine in the recipe anyway, unsure as really where it even fit in to the order of how to make this stuff. We ended up with a huge pan of tasty purple rice, that our other roommates absolutely refused to touch. We did our own dishes that night.

My next risotto memory happened maybe 5 or 6 years after the first. I'd had my entire senior year of college and four years of medical school to right the wrongs of the purple risotto and come up with my very own mixture of add-ins. I was on my very first date with my girlfriend, and some how (right, "some how") I started talking about food. She asked me what I usually made, I said I leaned towards Italian because of my heritage. She asked for examples, I offered risotto. She'd never had it before. Needless to say, over a year later we're still together. She'll tell you it was my home-made salsa that sinked it for her, I think it was a little dish of creamy, savory rice, cheese and mushrooms.


Mixed Mushroom Risotto

- One or two cloves of garlic, depending on your tastes, chopped fine.
- One large white or yellow onion, chopped fine.
(optional) One quarter to one half of a bulb and stalks of fennel (a.k.a. anise), weird frond-leaf things removed.
- A few glugs of olive oil.
- A generous pat of unsalted butter.
- A pinch of salt.
- As much fresh ground black pepper as you, your significant other, your children or your guests can stand.
- One cup of Arborio rice. I've used Carnaroli, however I was unilaterally unimpressed compared to mostly any Arborio I've used. Carnaroli is too long of a grain for this dish.
- Half of a little grocery store tub of sliced white button or baby bella mushrooms, washed THOROUGHLY and diced. Nobody likes dirt in their risotto.
- Either one grocery store tub of shiitake mushrooms, diced,
OR- one of those little packages of mixed fresh wild mushrooms (usually shiitake, enoki and portabello),
OR- assorted dried mushrooms that I usually buy at Ocean State Job Lot but you can sometimes find at asian markets and rarely at Trader Joes, reconstituted per package directions, diced and water they've soaked in reserved,
OR- assorted fresh actually wild mushrooms, like from your yard, but only if you're an accomplished forager or an old school Italian like my dad, also diced,
- 1 cup of white wine that you should plan on drinking with the meal.
- 6-8 cups of chicken (or veggie stock) warmed up. If you're a vegetarian (I'm not) and you don't like your local canned/cartoned vegetable stock (I don't), feel free to use the flavorful liquid left over from soaking the dried mushrooms - especially the shiitakes. You'll have to add a little salt to make up for what's missing in the stock.
- About 1/2-3/4 cup non-hard Italian cheese. I usually use Fontina, but lately I've been on a kick where I use Trader Joe's Italian Truffle Cheese. It has black truffle in it, which enhances the whole mushroom theme of the dish (and tastes awesome). Either shred this with a grater, or cut it up into small cubes.
- An equal amount of grated Parmigiano-Reggiano cheese. Use the real thing, folks. Save the green can for... well... you should probably just throw the green can away. It's gross. The best stuff has the words "Parmagiano Reggiano" written in little pin holes in the rind.

Okay. Mix your aromatics (garlic, onions and maybe fennel) with the oil and butter and sweat over medium heat. When a recipe author tells you to sweat something, they mean put it over the heat until little beads of moisture form, but nothing has turned brown yet. Maybe a little golden, but not definitely not brown. Add in the rice. Yes, into the hot pan with oil and no liquid. This is how you make every risotto, not just mine. Allow the rice to cook until the sides of the rice are clear and the very middle is still white. Now add in all of the mushrooms, and then the wine. Stir frequently, allow the rice to absorb the wine. Once things are relatively dry again, add in a cup or two of stock. Allow it to absorb. You will repeat this step more times than you think possible. After about 4-5 cups, just add in one half a cup at a time. Do this until the rice cannot absorb any more liquid. Once you've reached this stage, the rice should have a creamy texture from all the starches it's let out during cooking. Feel free to taste it, the rice should have just a little bit of hardness to it. It should not be mush. If you've added too much liquid, not to worry. Just let the rice sit for a couple of minutes and the excess liquid will cook off and maybe absorb a little more than you thought it would. Last but not least, stir in your cheeses. The rice should already be creamy before any dairy is added, the cheese is more for flavor than texture. If you have any left after your meal (you may not, trust me), risotto makes mean left overs. I won't even get into the sweat-shop-style labor that goes into the best way to eat left over risotto: arancini. I'll save that for another posting.

I actually just made this for dinner last night, but I forgot to take pictures. Sorry folks!

Tuesday, October 6, 2009

Sandwiches 101: The Stacked Italian

This is a sandwich I made up for entry to a Trader Joe's recipe contest. It didn't win, but it's still a solid lunch or snack. Pardon the annoying "TJ's" everywhere, the contest rules required using 3 or more Trader Joe's products.

The Stacked Italian

This is a quick recipe for two slider-sized sandwiches, and is easily scale-able for a crowd.

Two TJ's Ciabatta Rolls

One TJ's Ovoline Mozzarella Ball

Six slices Daniele/Daniele Black Peppercorn Salami - found in the refridgerator section of your local TJ's

One TJ's Organic Slicing Tomato

Two teaspons TJ's Olive Tapenade

Preheat the oven to Bake 350, and toss in the ciabatta rolls. Place the salami slices on a pan and turn to medium/high heat. The salami will puff up in the middle, let out a lot of oil and become crispy. Turn once and continue to fry to desired crispiness. Slice the tomato and mozarella into 1/4 inch rounds. Remove the rolls from the oven, slice horizontally and place a teaspoon of olive tapenade on the top half of each. Alternate slices of tomato, fried salami and mozarella on each sandwich evenly and top with the tapenade'd roll-top to desired stack height. Serves two as a snack, one as a meal.

Tuesday, September 29, 2009

Tony's Food 101: Introduction

So I've been deliberating over whether or not to start a food blog of my very own for a while. It wasn't until I went to a cookout one of the other residents threw a couple of weeks ago that really cinched it. I brought a chipotle potato salad I invented, and when someone demanded I give them the recipe, I decided I'd kill two birds with one stone: Create the food blog I'd been thinking about and post the recipe on here.

Before we get to the recipe, a little bit about me and my food. I am a home cook, and I have no professional training in the culinary arts. I am, however, a licensed physician. The years of science that went into getting that degree (particularly the much hated years in chemistry, biochemistry and physics) has lent a surprising degree of insight into how food works, both when we take raw stuff and apply various sources of heat to it and after we stuff it in our mouths. Basically, a ton of science education, a lot of practice in the kitchen and a few roommates/girlfriends/family members willing to test out my little creations have brought me where I am today.

I mostly cook using two basics. The first is an idea of what would taste good with what, which is a sense that was cultivated in me early by my mom and then developed over several years in my own kitchen away from my mom. I put things together that would definitely offend my parents' food sensibilities. Sometimes these things work, sometimes they definitely don't. The second basic is a wide set of techniques learned from watching The Food Network during years that I had cable, flipping through recipe books and food magazines the rest of the years, and practicing nearly every night in my kitchen. That's right. I cook dinner almost every night. Sometimes it was just for myself, sometimes there were the above mentioned roommates/girlfriends/family members around to benefit.

One thing I do not like to do is measure, and therefore bake. I do bake on occassion, and it usually turns out pretty well. My disuse of standard measurements means most of the recipes I post on here will have loose, unspecific amounts of ingredients to put into them. I'll do my best, but I won't make any promises. If there's an ingredient listed in a recipe that you really love or have a bunch extra of, by all means put more into the recipe. Again, things I post are more pairings of techniques and good flavor combinations rather than exact formulas you have to follow to the letter.

Enough rambling for now. Onto the promised potato salad:

Chipotle Potato Salad
Depending on how many chipotles you add, this potato salad can have a nice background heat that shows up in the aftertaste, or it can make your fellow resident's kid cry (like one particularly spicy batch did). Either way, there are spicy-ness levels to suit everyone.

- 6-8 medium sized potatos. I like to use a combination of different kinds, but not any with rough skins like russets. Your local famer's market should be more than able to accomodate. Trader Joe's also sometimes sells a nice bag of mixed yellow, red and purple potatoes. Cut these into 1/4-1/2 inch cubes.
- One big carrot, peeled and finely diced.
- Three or four stalks of celery with leaves, also finely diced.
- Half a large red (spanish) or yellow onion, you guessed it... finely diced.
- One half of a small container of fat free greek yogurt. I tend not to use the Trader Joe's variety as it's too runny and too much like regular non-greek yogurt. Feel free to eat the rest, unless you can find another recipe that only uses half a container of greek yogurt.
- The yogurt container's worth of mayonnaise. I like Helmann's. Take your pick.
- One can of chipotle peppers in adobo sauce - usually in the hispanic food isle at grocery stores. You only need two of the peppers and a little bit of sauce, save the rest. Finely chop the peppers, seeds and all.
- Black pepper.
- Salt.
(Optional) - A small handful of cilantro leaves chopped finely. I've never tried this ingredient in this recipe myself, but it sounds good.
(Optional) - 4-6 Slices of bacon, coarsely chopped and fried up crispy. I've used bacon in this recipe once, and it was reportedly amazing.

Boil the potatoes in a kettle of salted water until tender, but not mushy. You want potato salad, not cold mashed potatoes. While they're boiling, toss the chopped veggies in a large mixing bowl. In a small mixing bowl, whisk together the mayo, yogurt, the two finely chopped chipotles, two heaping teaspoons of their adobo sauce, the black pepper and the cilantro if you decide to use it. When the potatos are tender, rinse them in cold water and then toss them with the veggies. Fold in the yogurt/mayo sauce. Add the bacon, if you're using it. If the potatoes are overcooked, this is where they'll turn into mashed, so be careful. Season with extra salt, to taste. Serve room temperature or cold. Don't leave out too long, the yogurt makes this potato salad less shelf-lifey then most.

Until next time.